|
|
|

Adding Windows to the Big Jungle Gym
The easiest way to get
nice windows is to have
someone else cut and drill the Lucite for you. :)
However, that aside...
If you start with two
sheets of 32" x 44" Lucite (or a similar acrylic),
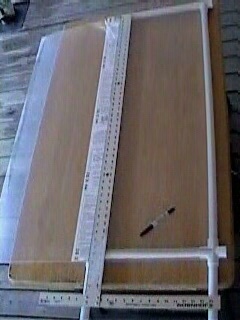
you can simply lay the sheets directly on the side panels,
lining up the sheet with the center of each pvc pole,
and use a marker and a straight-edge to draw cut lines.

You'll be able to get
two side windows out of the one sheet.
The other sheet will yield the window portion of the front door.
To cut the Lucite, I prefer
an orbital saber saw with sharp Bosch blades
although people tell me that scoring both sides deeply
and snapping gives a nice clean edge.
Once you've cut the windows
to size, which will mean making three cuts total,
one across the bottom and two down the middle...
well, actually the one across the bottom is optional,
since the window can underlap the lower panel.
The dimensions will be
roughly 15 1/4" x 43 3/4" for the side windows
and 26" x 44" for the front door window...
... depending on how accurate
your cuts were and how tight the pvc is
in the connectors... There's a bit of flexibility in these measurements.
Use a sharp drill bit to make holes about a half an inch in from the edges.
I like to space them out to match the holes in the white side panels,
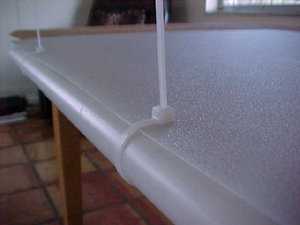
so that I can use just one cable tie -- through both holes and around the
pole,
just like we did with the back panels.
Just hold the side window
up to the frame and mark where the holes
need to be to match up with the back panel holes. Then drill, against a piece
of scrap wood
to avoid cracking the Lucite.
Make sure that the cable tie square ends are flat against the Lucite and clip
the excess.

The side window panels
are attached to the outside of the cage frame,
just like the white back panels -- lining up all the holes.
The door window panel,
however, is attached to the inside of the door frame,
so that you have the poles accessible to grasp, to open the door,
as well as having access to the bolts that keep the door shut.
Here's a tip: take the protective plastic off the Lucite before attaching it to the cage frame.
Another tip: If the cut
edges of the Lucite present any dangerously sharp edges,
you can use thin white cloth tape to cover the edges all around, nice and
neatly.
.....
Now we've done the frame and the front door and the ceiling and the back panels and the windows.
Phew. Now all we've got left to do are the shelves, which are really cool, and then the floor.
Well, maybe I should
hold back on the floor plans... after all, I want to entice you to
order the Material List, which will answer a few more questions --and
save you a lot of time figuring out exactly what you need.
Maybe by including the
floor plans with the Material List,
it would be just enough incentive to get you to click on that Paypal button
down below.
-- or to drop a check in the mail...
It's only $19.95.
That's only like a couple
pizzas and drinks... or three trips to Taco Bell.
(Note that our iguanas eat a lot healthier than we do!)
It's easy! Just drop
a check in the mail for $19.95 to: Keith Van Zile
1125 Clare Avenue, West Palm Beach, FL 33401
or just use Paypal right
now. You can even send a note!
Tell me how much your iguana will love the new cage!
Then I'll promptly email
you the Material List, with more helpful tips,
and some great ideas for making the floor!
Isn't that worth missing
a little pizza for?
Your iguana will be so happy!
Introduction | The Plans | The Cages | Order Plans | Q&A